
Tutorial to shorten a bicycle chain
Chains do the most work on a bicycle. Did you think it was you all that time? Well, there is something that you need to know about the chains and how they work. Over time, you will notice that they stretch and that causes problems that include it slipping off all the time. So you know how it’s important to know how to shorten a bicycle chain
You will also have to make sure that you have checked everything to make sure that you do not exceed the limit that has been set when you use the bike chain. Sometimes, you will find that shortening just won’t do and that means you need to replace it entirely.
Process on How to Shorten a Bicycle Chain
- Removing the Chain
- ThShortening the Chain
- Getting the Chain Back on the Bike
The First Part: Removing the Chain
1. Does it Have to be Replaced
This is the first question that you will need to ask yourself before you can do anything and that means you have to take some tests that will help you know when it is time. The length of the chain needs to be measured first.
You will use that to compare it with the length of the chain when it is new, and that is how you will know that it is time to replace. The pins will wear out, and that will be the reason why it becomes longer and snaps altogether.
2. Get a Tool Kit
This is very important as you will need to make sure that you have everything that you will need to make sure that the bike is in perfect order. There is also no point in improvising with some shoddy tools that you pick up in the garage.
Get a toolkit that will help you with the process of changing this so that you can have it all better. You will find that some chains will need you to have the specific stuff like the Shimano and Campagnolo types. Get that too.
3. Get the Bike Suspended
This means that you have to make sure the wheels are not touching the floor. You can let the front wheel be on the ground but not the back wheel. This is the one that is most involved with the chain and it will need to be free to rotate when you are testing it.
Suspending the bike will help you have an easy time with loosening and attaching on the new chain. This is something that will also help you have the best service. The oiling and the testing will be easier with the wheel not touching the floor.
4. Shorten and Get it Back On
When you have finished the process of cleaning the chain, you will oil it and put it back. This will require some finesse. You need to make sure that you take off an extra link or tighten the pins. Sometimes you will find that you have to change the pins altogether.
The chain needs to be clean so that you can see the problems well. This will help you fix it and make sure that you have a chain that works correctly. That is the reason why you have to clean it before you begin anything. Oiling will help with the smoothness and friction problems.
The Second Part: Shortening the Chain
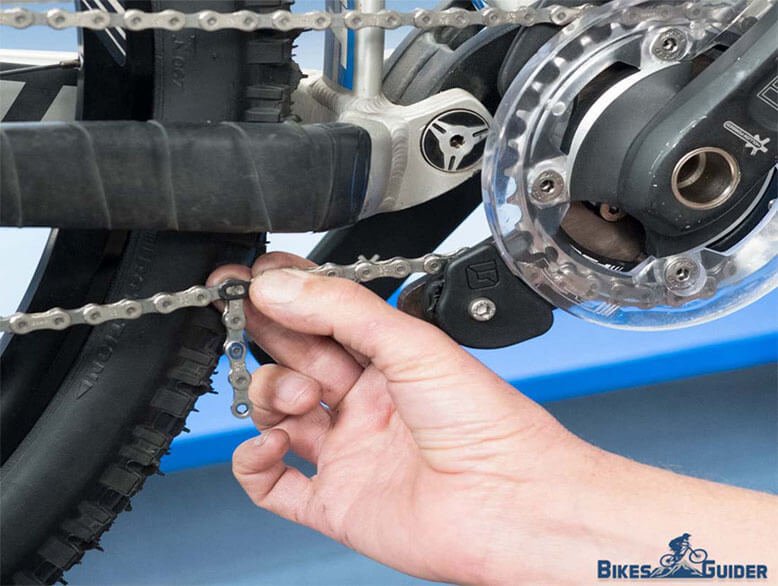
1. Removing the Links
When you have the chain all cleaned up, you will see the links that are not well connected or they have been stretched. That is when you will see which links need to be removed. The chain will then be easier to deal with because it is of a length that you can work with.
You will also need to know how many of those links you need to get out because you don’t want it to be too tight or too loose. The right length will be determined by measuring the chain when it is still on the bike.
2. Get The Right Tools for this Job
When you need to get the chains in the right length, you need to make sure that you can remove the links without having much trouble. Here is where you will need to have those tools that I talked about in the first part.
They will help you disassemble the links so that you can shorten the chain better. As far as I can tell, there is no better way of doing this than with the right tools. The pins will slide in and out of the links smoothly enough so that you don’t have much trouble.
- YOU MAY LIKE: How to Replace a Bike Chain
The Third Part: Getting the Chain Back on the Bike
1. Getting the Master Link Onto The Chain
After you have made sure that the chain is of the right length, you will have to get it back on the bike. That means that you have to use the proper tools to get this done. The master link will have the right kind of pins and tensile strength that is required to connect the loose ends.
When you are looking for the master link, you will need to make sure that you have the right model to make sure that you do not have any problems when you are reattaching. They are usually almost the same, but that is not sufficient. Everything has to match.
2. Reconnecting the Chain Ends
When you have gotten the chain in place, you will need the chain tool to fix it into place. This is because there is no way that you can do it with any other tool. You will have to make sure that the pins are facing towards the chain tool’s pin for an easy reconnection.
With the quick release kind of link, you will need to make sure that you have pliers because they will be a great help. The replacement should be a smooth one because there is simply no way that you can mess up it up if you have everything that you need.
What You Need to Remember
It is always wise to make sure that you have lubricated the chain; this will help with the whole process because everything will just slide in very smoothly. You will also find that this increases the lifespan and flexibility of the chain.
Tips
- Make sure that the back tire is not touching the ground when fixing this.
- Do not tighten the chain too much or make it too loose that messes up the ride.
- Lubrication is always the key to longevity and durability.
- Get all the tools that you will need before you start.
Warnings
- Never push the pins all the way our, they are tiring to replace back into the links.
- Do not remove too many links, adding more is just unneeded work.
Question: What happens when it is too short?
Answer: Let us just say that there is no way you will enjoy the rides. Also, it will make it easier to break the chain.
Question: Where do I find the tools?
Answer: Google. You can look for pictures, names and also models to get the right kind.
Question: Can I take off the chain without the master link?
Answer: I’d prefer if you didn’t but just get a chain tool. It will be easier that way. Saves time too.
- YOU MAY LIKE: Bike Chain Lubing Properly
Reference: Quora, Bike Forums, Bicycles Stack Exchange
Last Updated: 04.10.2018