
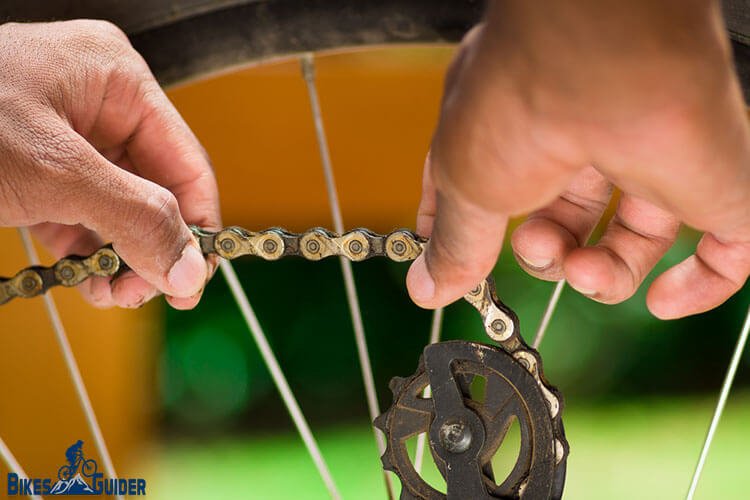
How to Change a Bicycle Chain – Easy Instruction by Experts.
How to Change your Bicycle Chain
Being able to change your bike chain on your own is very beneficial as its less costly and convenient depending on how urgently you need to use your bike. It’s a simple task as well. When you change your chain, you save money as replacing the chainrings is rather expensive.
Many newbies do not know that a bike chain needs to be changed frequently. This is often discovered after the chain has worn off and is rendered no longer useful. This usually takes the form of the chain that slips when the bike is being pedaled. Chains do wear but in a very odd way they kind of a stretch.
It is rather difficult to know whether your chain has worn off and needs replacing. The primary red flag may be all the dirt that accumulates on the chains. The pins that hold the links in place may get worn by all the grit that is gotten from cycling for a long time.
No matter how carefully you look after your bike, changing the chain is inevitable and will come sooner or later. There are many different types of bikes, but the process of changing the chain is the same.
It may come as a shock to many bike owners that the chain needs to be replaced for further use as the chain may be severely damaged. It may become dangerous when the chain is not replaced in time as a painful injury may occur during riding of the bike.
Steps of How to Change a Bicycle Chain
- Removing the Old Chain
- Clean the cassette
- Thread the new chain
- Workout correct length
- Cut to size
- Push pin in place
- Work finished
- Test your chain
Step One: Removing the Old Chain
The process of removing the old chain; the first step is to position your bike in such a way that accessing the chain may be easy. The bike may be turned so it can stand on the seat.
One of the chain pins has to be directly aligned with the small slot. For this to happen, the chain is positioned across the many jaws of the toolchain. Then proceed to push the pin by forcing it out while rotating the handle.
An important point to note is to make sure you don’t completely remove the pin. It poses a problem when trying to return it to its place.
Step Two: Clean the cassette
Clean the cassette. Before anything else, look at the cassette to check for wear. This is usually indicated by the teeth looking extremely sharp. If the teeth are symmetrical, then you can clean it using a solvent as it will be easier and makes more sense.
Step Three: Thread the new chain
Thread the new chain. The new chain should be threaded through the cage. Care should be taken to keep the divider inside the plates. It goes around the wheel and through the tab.
Step Four: Workout correct length
Workout correct length. You should ensure that you are working with the right length of chain. It is advisable for the chain to be extended but still tight on the derailleur for it to not drag.
- YOU MAY LIKE: Untangle Bike Chain
Step Five: Cut to size
Cut to size. You should ensure that the chain can function in any gear, without in any way destroying the bike. There are two types of very well-known brands, the Shimano chain, and the SPAM chain. The Shimano must have three plates while the SPAM only requires two inners, one found at each end.
It is advisable to divide the chain while employing the use of the chain tool. This is when you have detected some motion in the derailleur. After you have identified and marked the link that needs to be removed, you use the chain tool to turn the hard handle until the middle of the link is pushed by the pin.
You then take the pointed ends of the bike chain and put them near each other. Then to hold the chain together, you have to force the pin into the chain. It should be able to remain in its place without having to be supported. The handle should be unscrewed.
Step Six: Push pin in place
Push pin in place. The link should be slotted into the toolchain. The pin should be put in its original place. When it’s slotted in place, remove the bike chain tool.
Step Seven: Work finished
Work finished. When it is in the right position, the chain should be moved horizontally in a bid to free the link. The final process is to check whether the link is moving freely. If it doesn’t, you need to use the tool chain to give it a push.
Step Eight: Test your chain
Test your chain. You should try to move the pedals with your hands so that the chain can go through the drive train. If the chain does not move in a free and smooth way, then there may be a link pin out of place. The link pin should be pushed back into its place by use of the chain tool and maybe even pliers.
It is essential to know that the bike chain needs to be lubricated frequently to help it work in smooth condition. The excess lube can be removed by wiping with a tissue or cloth.
Warnings
- You need to carefully watch over the state of the chain, especially in high humidity areas or sandy areas.
Tips
- Always remember to wipe and lube the chain especially after riding in water to avoid it rusting.
- When cleaning the chain, do not use any degreaser as this often removes the grease, causing a lot of damage in the long run.
- Most bike makes are compatible with the Shimano type.
Question: How can I measure a chain for wear?
Answer: As the chain wears, the sprocket becomes damaged. This, in turn, leads to miss-shifting. You can buy special tools that are used to detect for wear in chains.
Question: How can I care for my chain?
Answer: By cleaning and lubricating it as regularly as possible. Remember to lube each roller separately, especially after very long bike rides.
If you went through the article then you might found the information you’re looking to change your bicycle chain. If you find this article helpful then please leave a comment below to inspire me to produce more articles like this for the cyclist. Happy Pedalling!
Last Updated: 04.10.2018