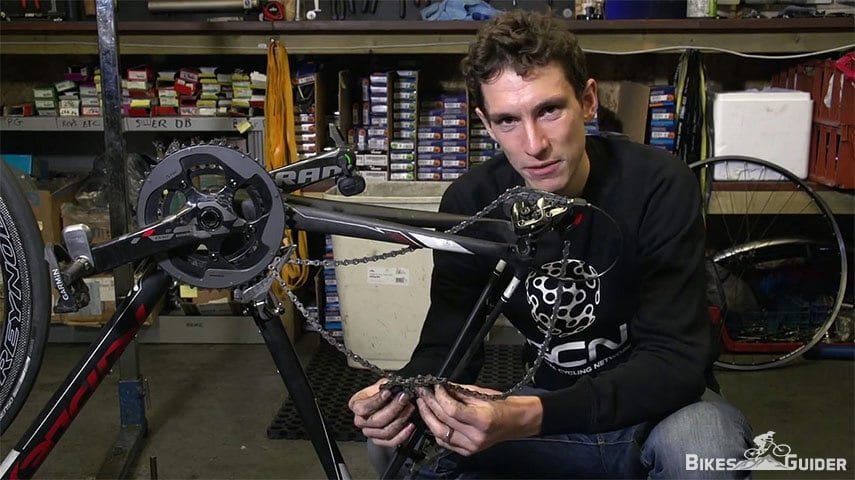
Tutorial to untangle a bike chain
Tangled bike chains are a common occurrence among bikers, and you will find that this is something that needs to be taken care of in the shortest time possible.
There are many ways on how to untangle a bike chain. It is a relatively easy one to fix.
You can either slacken the chain then shake it loose, or you can do this the easy way and just loosen it from the sprocket and try to get it to be straight. This will take very few minutes from start to finish.

Untangling a chain bike will be necessary because the whole thing can get tangled in the middle of nowhere and you’ve got to ride home.
Today, we are going to take a look at the stuff that matters when you are trying to untangle a chain. This will help you know what you are supposed to do and then you will have no problems with the tangled chain again.
Process on How to Untangle a Bike Chain
- Slackening and Untangling
- Removing the Chain from the Bike Completely
- The Good Old Shake Fix
Part 1: Slackening and Untangling
This is the easiest and most used method that most people prefer and they do so for a reason because all you need to follow is this simple process.
- Move the chain to the smallest sprockets. This will have the effect of making the chainless taut, and then you can be able to get it to work its kinks out. Do this until you are sure that the chain is hanging and able to be shaken properly.
- Then, you will move on to the derailleur which will make it even easier to get this done. This mechanism is the one that guides the chain in the rear. It will be pushed inwards to make sure that you get the extra slackness in the chain for better untangling.
- Now that you have done the chain simple enough to untangle, all you have to do now is make sure that you untangle the chain. This should be done gently and with caution to ensure that you don’t ruin anything there.
While you are doing this, there is the chance that you could end up creating more tangles in the chain and that is why you need to be careful not to do that. With more slack in the chain, this should not be a primary concern though because you won’t have to struggle that much.
Part 2: Removing the Chain from the Bike Completely
When you have tried the regular slackening and untangling method, and then you find that it does not work, you will have to try this one. This is because with this one, you will have more space to work with and the untangling will be easier.
Also, the chances that you may create more tangles are lowered a lot.
- Suspend or flip the bike first before you do anything because it is easier if the wheels are not touching the ground. This will make it simpler to nudge out the chain, and the rotation of the wheels will be controllable. With the chain that high and easier to access, you will find that you have an easier time with the fixing. If you flip it on the ground and you don’t want it to be scratched, you will place something soft underneath it.
- Release the skewer on the back wheel when you have flipped it. This is a long-ish piece that gets into the holes that are in the bike’s rear and into the center of the wheel. This will allow you to get to the knob that unscrews the skewer.
- Unhooking the brake is what comes next because this will be in the way obviously. You will then have access to the chain. With a small screwdriver, preferably flathead, you will be able to reach the caliper and unscrew it.
- Slide the chain out and make sure that there is nothing in the way when you are doing this because if you are not careful, then you will have problems with the whole bike set. With enough slack, you will be able to remove the chain and see what is wrong.
This is the second method that you can use. It is simple and easy if you follow the instructions that you have been given and that is why we have them. You will have the entire chain length out, and that will make it easier to fix.
Part 3: The Good Old Shake Fix
When you have a chain that is giving you problems, you can decide to shake it out and see what happens. Of course, you will need to make sure that you follow a certain procedure because if you mess this up, you can end up creating, even more, tangles in the chain.
- Remove it from the pedals and anything that may be an obstruction. This will help you have an easy time when you are trying to shake it straight. If it is still attached to the bike, you have to be careful with the whole process because it is a delicate one.
- Untangling is the easy part if you know how to do it. All you need to do is look for the part of the chain that is not tangled and then use that to pull the parts that are tangled. You can shake them and see what happens. This will have to be done carefully.
- Straighten the chain first to see that it has been fully untangled. Do not assume that it has been fixed just because you gave it a few tugs and it came loose. This is to make sure that you have not screwed up anything while you were busy untangling it.
- A few more shakes will be very helpful because then you will know for sure that you have gotten everything right. You will also have to scan the entire length of the chain to be sure that no links are bent or loose in any way.
As you can see, this is not a hard thing to do, and you will not have to struggle that much. It is what it is and you will find that shaking is just as efficient as ever. This method, however, requires some finesse to make sure that you do not ruin anything.
Tips
- When you are untangling the bike, you will need to make sure that everything is in the right place before you do anything.
- You will need to have some essential tools when you decide to take the chain off the bike completely.
Before you start tinkering with the bike, you will have to make sure that it is suspended and that the wheels are not touching the floor. - If you don’t know what you are doing, do not try to be a ninja or anything like that. Just ask someone who does know about this.
Warnings
- Creating more tangles when you are shaking the chain is easy, and that is why you have to make sure that you know what is happening here.
- You don’t always have to remove the chain. If your bike has gears and many components, you will need to make sure that you have knowledge about that.
Question: What kinds of chains are the best?
Answer: You can try looking for the ones that are suited for your model. Maybe even check out what Amazon ratings say.
Question: How do you know that the chain is fixed?
Answer: I would look at it and make sure that every link is straight. That ought to do the trick.
Question: Will I need any tools for this job?
Answer: No, I don’t think so. Not unless you are taking the chain away from the bike in which case yeah, you will need some tools.
Did you find the information you’re looking to untangle a bike chain? Maybe YES. If this helps you a bit then please leave a comment below to boost me writing this kind of article for the cyclist community.
By the way, now that you have fixed your bike, you may want a nice rack for your car to transport it wherever you go.
Reference: Bicycle Tutor, Bikeradar, Reddit, Yahoo

