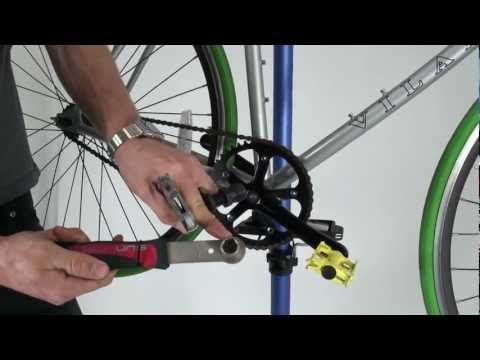
Tutorial Bike Crank Removal
The task of how to remove a bike crank sometimes gives the impression of being complicated upon a thought, but with the right set of tools, you can do it as easy as picking a flower.
There are diverse types of cranks according to the different manufacturers that produce various bike models. However, the most common one is the square tapered crank.

Remove Bicycle Crank in 2 Easy Steps
- Identifying Your Type of Crank
- The Process of Removing a Bike’s Crank
Part 1: Identifying Your Type of Crank
Because of the increased types of cranks, it is essential that you ensure which type of crank your bike possesses. Knowing your crank is the first process of how to remove a bicycle crank. It will help you know which tools to use and give you a clearer idea of how exactly that crank should be removed.
I am mostly going to feature explanations on how to remove a square tapered crank, but these processes are similar in a lot of ways except perhaps for only a few sections. I will provide further instructions where such a disparity arises.
One of the common types of cranks is the aluminum with a squared hole that aligns with the tapered square unit axle. Other types of cranks include the three-piece crank, the two-piece compression slotted cranks, the self-extracting cranks and much more.
- RELATED: Bicycles Stuck Pedals Remove
Part 2: The Process of Removing a Bike’s Crank
- You are probably going to need a crank puller so make sure you have it with you before you start removing the crank. Start by unscrewing the bolt that holds the crank in position. Take out the
- washers if there are any that are present.
- Check to see that your crank puller is the right size for the job. Several types of cranks will be used on different bolts and nuts.
- Apply some lube to the spindle and the mating zone too.
- Remove the center portion and unscrew it as much as you can. This is important as it prevents ripping out the threads.
- Make sure that the inner part of the tool is tightened and well screwed into the crank.
- Pull the crank and voila it will come off with the tool.
- Do the same on the other side.
Technically, if you want to know the process of removing bicycle crank, no matter what type it is, these are the required steps you will need to follow. The best part about them is that they are very few and quite easy to understand and put to action.
Warnings
- Stick to the recommended types of crank removers by your manufacturer. Other versions may make it difficult to remove the crank and even cause damage.
Tips
- Some cranks may have dust caps covering which will inhibit access. Unscrew the dust caps first.
- To make it easier, if you are removing the crank on the right side, take off the chain first.
Qsn: Is there a multi-purpose crank remover that can handle all types of cranks?
Ans: No. crank removers are each made for specific types of cranks. Get the right one for your bike.
Qsn: How will I know which type of crank remover is the right one for my bike?
Ans: It will usually be indicated on your bicycle or the instruction manual that came with the bicycle. Otherwise, you can also take a picture and show it to a crank remover dealer. He/she will know which one you need.
After went through the article you may be learned all the necessary things on how to remove a bicycle rank easily. If so then you don’t have to go to any bike mechanic shop to remove bicycle crankset.

