
How to Raise Handlebars on Mountain Bike | Guided by Experts
Bicycles are made differently, and this means that sometimes you can buy one that may be a little too high or too low for you if you don’t know how to size a mountain bike.
For example, the handlebars. It’s a vital part if you don’t know how to raise handlebars on mountain bike. At times, you may find yourself having an uncomfortable time riding only because the handlebars feel a little too high or too low for you.
So, what do you do in this case? You adjust them of course. Without the proper skills you may have a challenging time getting those handlebars right.
There are several reasons why you may want to adjust your mountain bike handlebar height. Lower handlebars lower your center of gravity, and elite riders normally do this kind of adjustment.
For those who only want to enjoy their bike riding as a recreational activity, they may prefer their bike handlebars high than the saddle.
Either way, you may decide to experiment with handlebars to see which height suits you best fortunately for you, the task is easy and only takes 15 minutes or less. This said, here are a few guidelines on raise handlebars on mountain bike.
Parts at a Glance on Raise Handlebars on Your Mountain Bike
- Adjust Handlebars That Have a Threadless Headset System
- How to Adjust Threaded Headsets
- How to Modify the Handlebar Angle
Part 1: How to Adjust Handlebars on mountain bike That Have a Threadless Headset System.
- These are the easiest to adjust of all handlebars. Most bikes will have a small room for adjustments on their stems to improve weight distribution. Such bikes may require you to purchase a new stem that suits your height.
- Threadless headsets usually have three bolts. There is usually a big bolt and two small ones which hold it in place.
- Sit on the bike and see which height of the handlebars will feel comfortable for you.
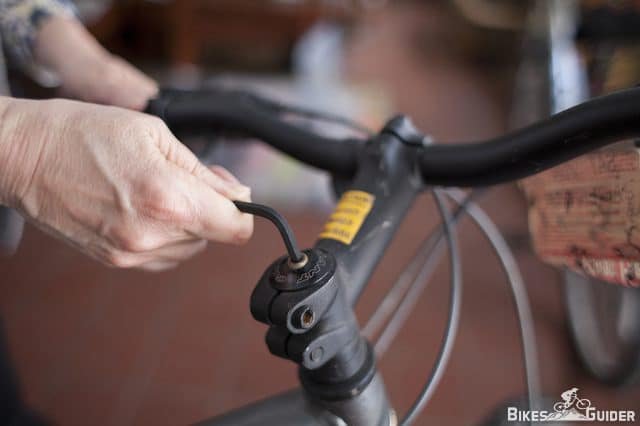
- With the help of an Allen key, unbolt the stem cap. This bolt fixes your handlebars in position and thus loosening it allows for the modifications to be made. Take out the long bolt and cap and keep them in a safe place for reinstalling them later.
- Still using an Allen key, unwind the other two small bolts so that they release their grip on the stem. This will help you get the handlebars and stem from the tube in the frame.
- Carefully take out the stem watching not to damage the brake wires or cables connected to the derailleurs.
- Increase or reduce the spacers (small circular risers) according to the height you desire. Spacers can be bought from the local bike stores around you.
- Return the handlebar over the spacers and reinstate the stem cap bolt. Use your hand to do the tightening. Do not worry about the alignment of the handlebars here as this bolt does not affect that.
- Place the stem in alignment with the front wheel. Take your time and be keen here as this will affect proper turning of the bike if you get it wrong since the handlebars will be out of line with the front wheel. Once properly aligned, tighten the bolts.
- The last step will be to inspect your bicycle, especially the headset, and make sure everything is properly fixed, all the bolts are tightened, the brakes are functioning properly and it still rides smoothly.
Part 2: How to Adjust Threaded Headsets
- Threaded headsets have a continuous stem that rises from the frame and curves forward to attach itself to the handlebars. They are very simple to adjust, and they are more common in older bike models.
- To adjust this, start by loosening the bolt that’s above the stem. Use an Allen key for this.
- Proceed to unwind the locknut using a wrench.
- Remove the handlebars from the frame.
- Clean the stem to remove any grim, dry it and apply some grease on it.
- When placing the handlebars back into the stem, consider the type of riding you will be doing. For example, if it is on rugged terrain it may be best to have them below the saddle for a lower center of gravity.
- Reinstall the stem back to its position and tighten the necessary nuts and bolts using your hand.
Part 3: How to Modify the Handlebar Angle
- The first move will be to inspect your bike and see if it has an adjustable stem. These kinds of stems will usually have a bolt place perpendicular to the point on the bicycle where the stem and frame intersect.
- To adjust the angle of such a design, simply loosen the bolt, modify the angle and quickly tighten it again. Remember to test it before proceeding with your ride.
- Another method is by loosening the four screws that attach the handlebars to the stem. Loosening them should create room for making the necessary angle changes.
When making changes to the angle of the handlebars, ensure you know how high or low you want them to be. You should adjust them to provide maximum comfort for you like your ride.
You can have a friend help you in doing this. They hold the bike as you climb and analyze which position of the handlebars is the best for you.
When it comes to adjusting handlebars, you need to remember that it’s not about fixing it in the ‘classy’ height or what’s trending. It’s about getting it to be comfortable for you. So always test this by sitting on the bike and assessing which height feels okay for you, then fix the handlebars to that height.
Warnings
- When tightening the stem, use a torque wrench if you are dealing with a frame made of delicate materials such as carbon fiber to prevent from damaging them.
- Check all the bolts and nuts after making the handlebar changes to doublecheck that all of them are tightly screwed in place. Otherwise, you could end up having an accident later with your bicycle or causing extreme damage to it.
Tips
- Before continuing with bike riding, check to see that you can still reach the brakes comfortable after adjusting the handlebars.
- Be careful and check to make sure that you do not kink the brake wires when changing the angle or position of the handlebars.
- If changing the handlebars proves to be more challenging you can always opt to adjust your saddle height.
Qsn: I continue to feel discomfort even after adjusting the angle and position of my handlebars. Why is it not working?
Ans: It could be the angle of your seat that’s the problem. Try checking it.
Qsn: Which is the perfect handlebar angle for maximum speed?
Ans: The position of the handlebars should be determined by the terrain you will be covering and how comfortable it makes you feel. Changing the handlebar position is a matter of personal preference. The position which makes you most comfortable will be your best for riding the bike with.
Qsn: I keep getting numb palms from riding my bike.
Ans: Try raising the angle of the handlebars a little higher to allow for more blood circulation in your palms.
If you went through the full article then you may find some necessary information on how to raise handlebars on your mountain bike. If this article helps you a little bit what information you’re looking for then please leave your comment to boost me on writing more informational articles like this for cyclist community.
Reference: Quora Bikeforums